Zipper Flowers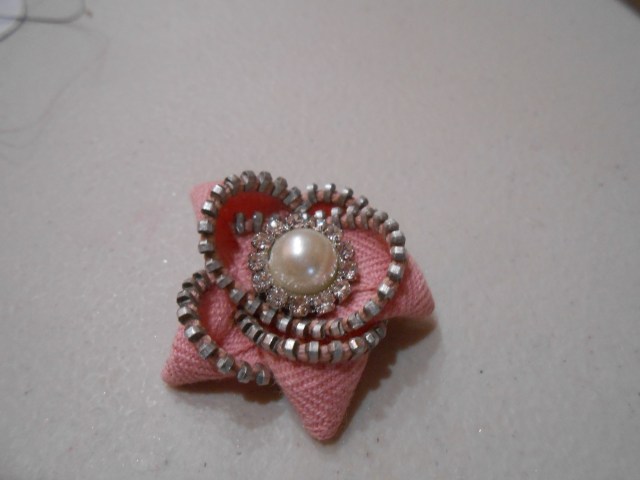
Supplies needed:
Scissors button or pearl embellishment for flower center.
Needle
Thread
Zipper- size varies on the size of flower you want to make. The metal teeth zippers work the best as they are stiffer, but the nylon ones work as well for smaller or less structured looking flowers.
Cut the Top Stop and the Bottom Stop off the zipper and slide off the zipper Pull, separating the zipper into 2 parts. Set aside on half for a different project.
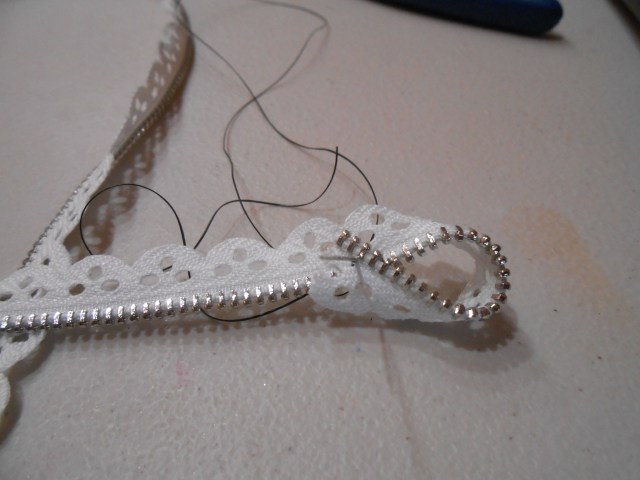
Take one end of the zipper in your hand and make a loop/petal, making sure that the teeth of the zipper is always on the outside of the loop. The size of the loop will depend on how big you want your entire flower to be, and the length of your zipper. Take your needle and thread [double for added strength] and come up from underneath through all layers and back down to secure.
Continue making loops/petals and securing until you have completed all the loops. Add the button in the middle.


Rose zipper Flower
Here is what you will need:
Chipboard (round ~1.5″ piece)
2. Two and a half feet of zipper trim (a tip, if it isn’t all one continuous piece you can use various different pieces or try different colors for a different effect)
3. Hot glue gun and glue
Start the rose by gluing the zipper straight across the edge of the chipboard.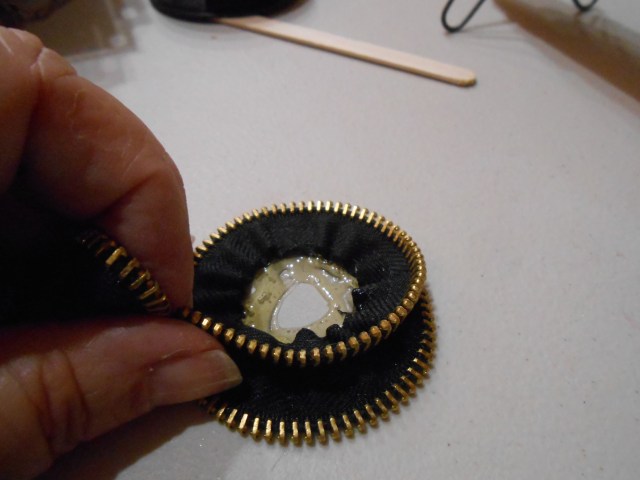
Step 3. Apply a dot of hot glueand pinch the zipper back. This will cause the zipper to curve. Do not be afraid to be aggressive with your zipper (in fact, you have to be sometimes)
Step 4. Continue to do this in sections until you have gone all the way around the outer edge of the chipboard. With this piece of 1.5” chipboard,you can wrap it around about 5x in 5 sections.
Step 5. Now it’s time to start working your way inward. Again, don’t fear the zipper – you will have to be a bit aggressive. Also, be a bit more liberal with the glue as you move inward because your space is getting tighter and you want your flower to hold. Once I get to row two, apply the hot glue directly to the chipboard.
Step 6. Since you are working with excess hot glue and you need to move quickly, use a pencil or a stick or some other tool that you can apply pressure with. This will push the glue into the fibers of the zipper and hold it in place.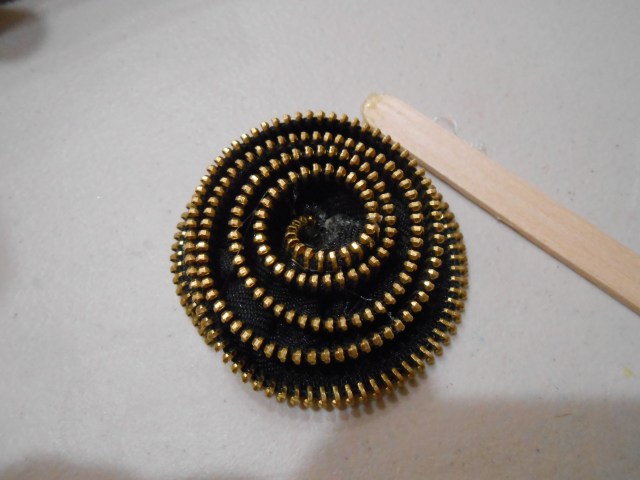
Step 7. Continue to work your way to the center as seen in the photo.
Step 8. Once you get to the very end, trim the excess zipper if still very long. Make sure you leave enough zipper to finish the flower Apply hot glue to the center of the flower and then tuck the end of exposed zipper as seen here to the center of your flower.


Well, that’s all the news from the south,
Happy” farming” to all the farm girl sisters out there.
See you next time down on the farm.
